Sell products on your entry forms
Products let you sell extras alongside event entries — think meal tickets, merchandise or camping fees. Entrants choose a quantity while they’re entering, and the cost is added to their checkout total.
Setting this up is a two-step process:
- Create the product so it exists for the event.
- Add a “Question” for it to each type of Entry Form so entrants can actually select it.
💡 The second step is easy to miss. If you’ve created a product but checkout only shows the credit card processing fee (e.g. $1.42), it means there’s no Product Quantity question yet — entrants have no way to add the product to their order. Follow Step 2 below to fix it.
Step 1: Create the product
- From the Entry Place Organiser Portal, open your event and go to Entry Settings → Products.
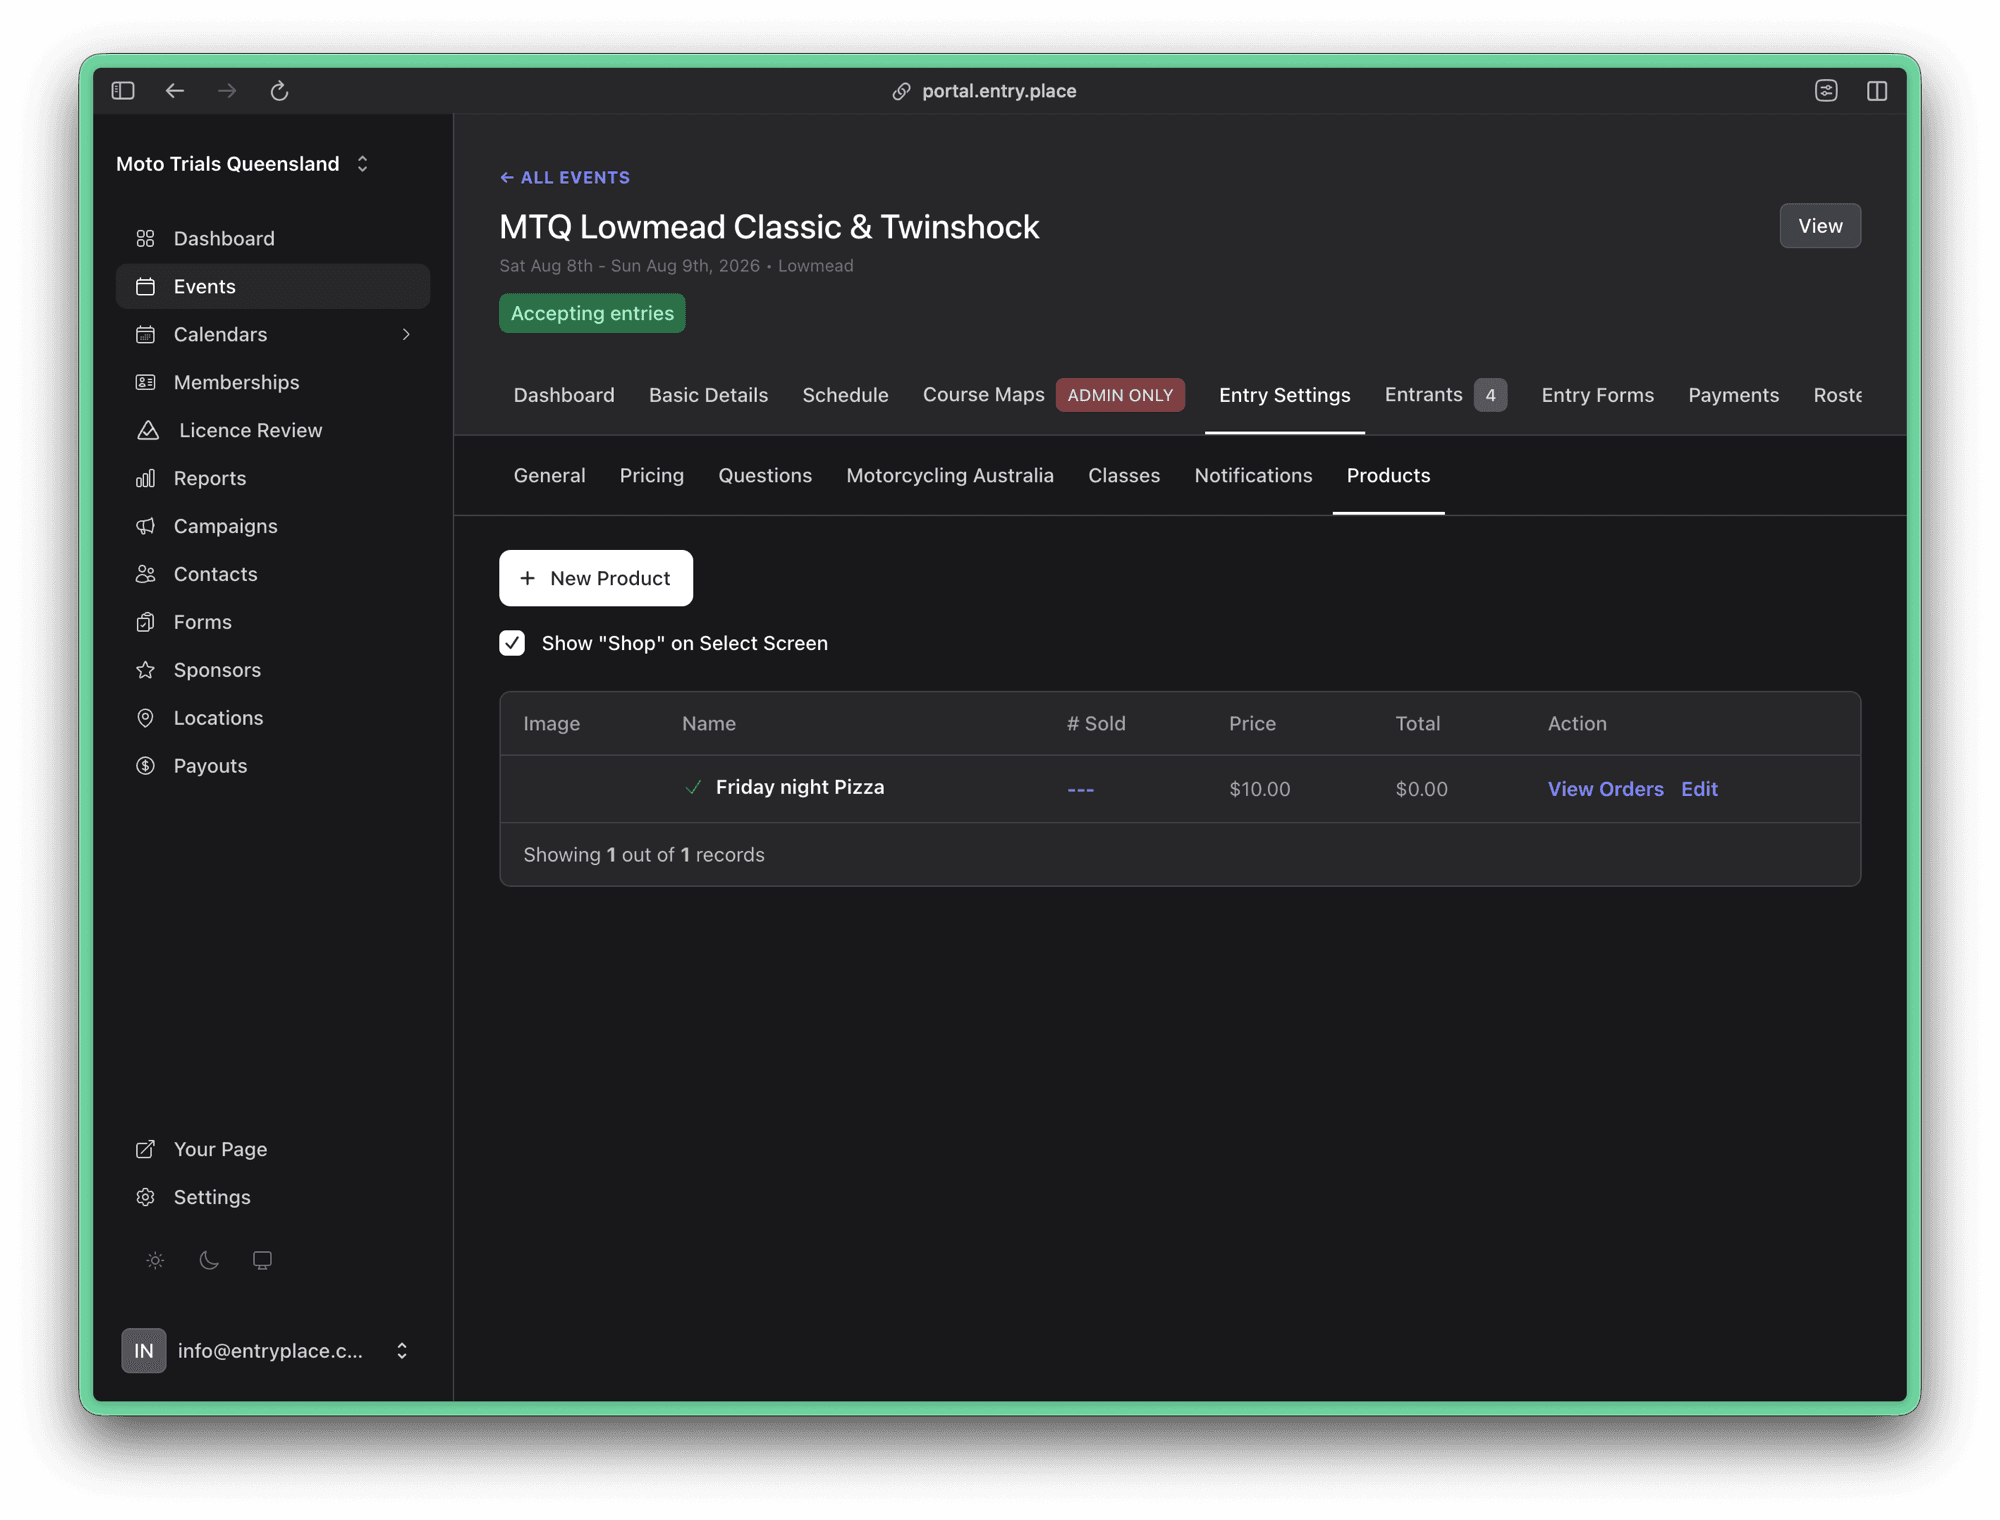
- Click New Product.
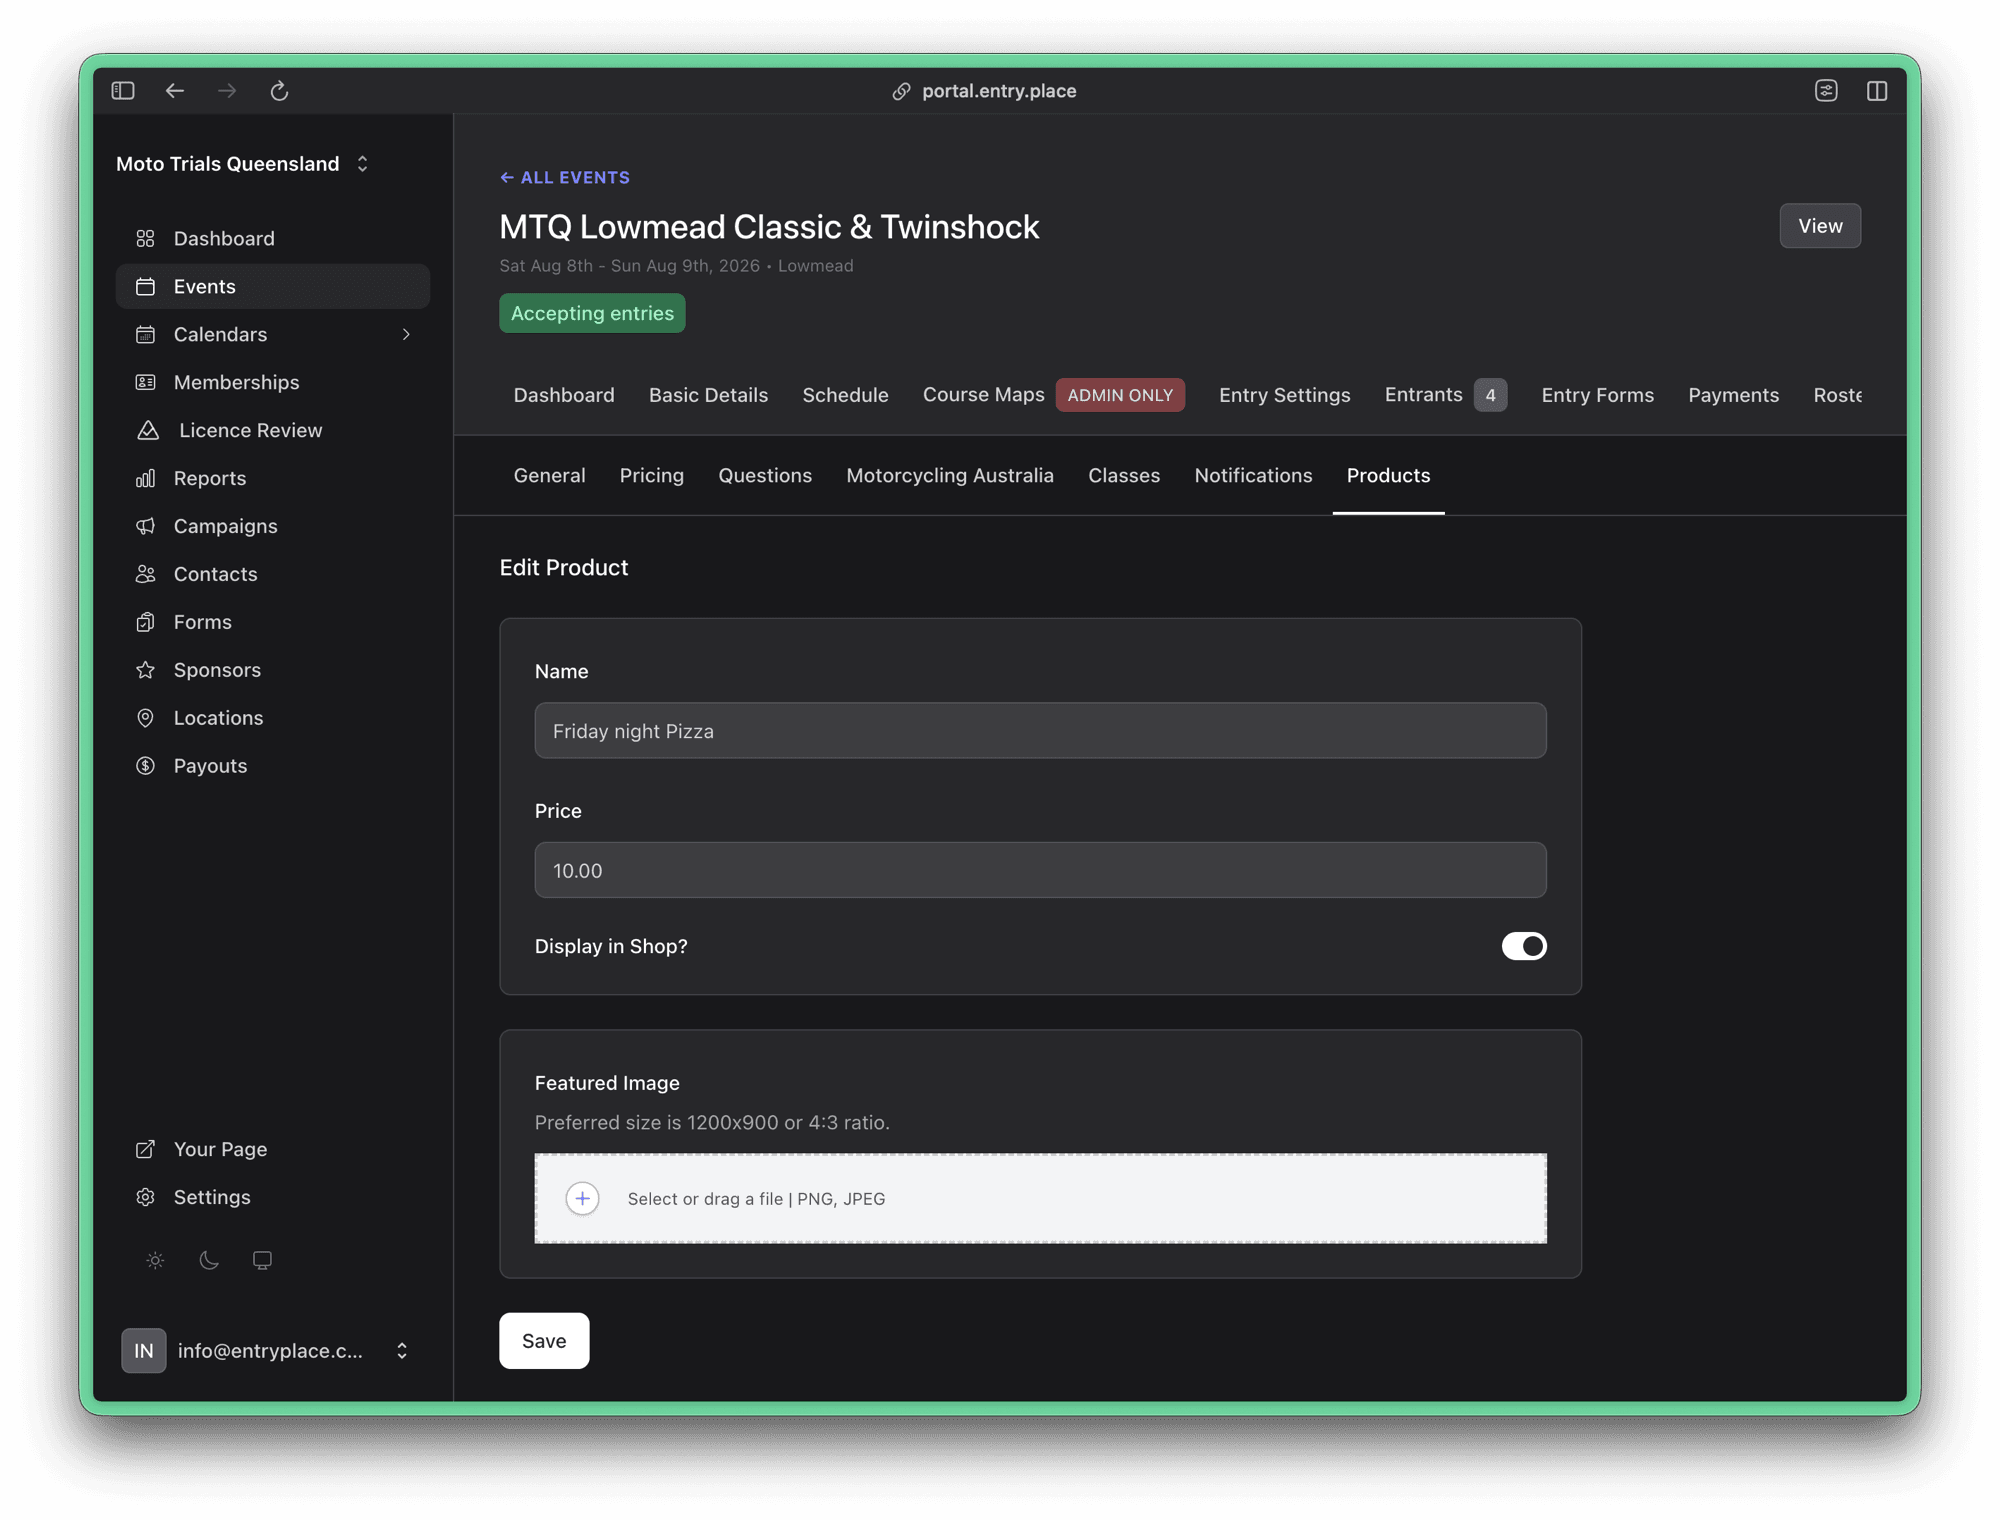
- Give the product a Name (e.g. Friday night Pizza) and a Price.
- Turn on Display in Shop? if you’d like the product to appear in the event’s dedicated Shop area.
- Optionally add a Featured Image (1200x900 or 4:3 ratio works best).
- Click Save.
Back on the Products tab, tick Show “Shop” on Select Screen if you want a Shop section to appear alongside your entry tiers when entrants pick what to purchase.
Step 2: Add the product to your entry forms
This is the step that makes the product show up (and get charged) on entry forms.
- Go to Entry Settings → Questions.
- In the Buyer details section, click Add Question.
- Give the question a label — this is what entrants will see (e.g. How many Pizzas?).
- Set the Type to Product Quantity.
- In the Groups column, tick each form the product should appear on — for example Family Early Bird, Family Late Entry and Shop.
- Click the cog icon and choose the product you created in Step 1 from the Product dropdown.
- Click Save.
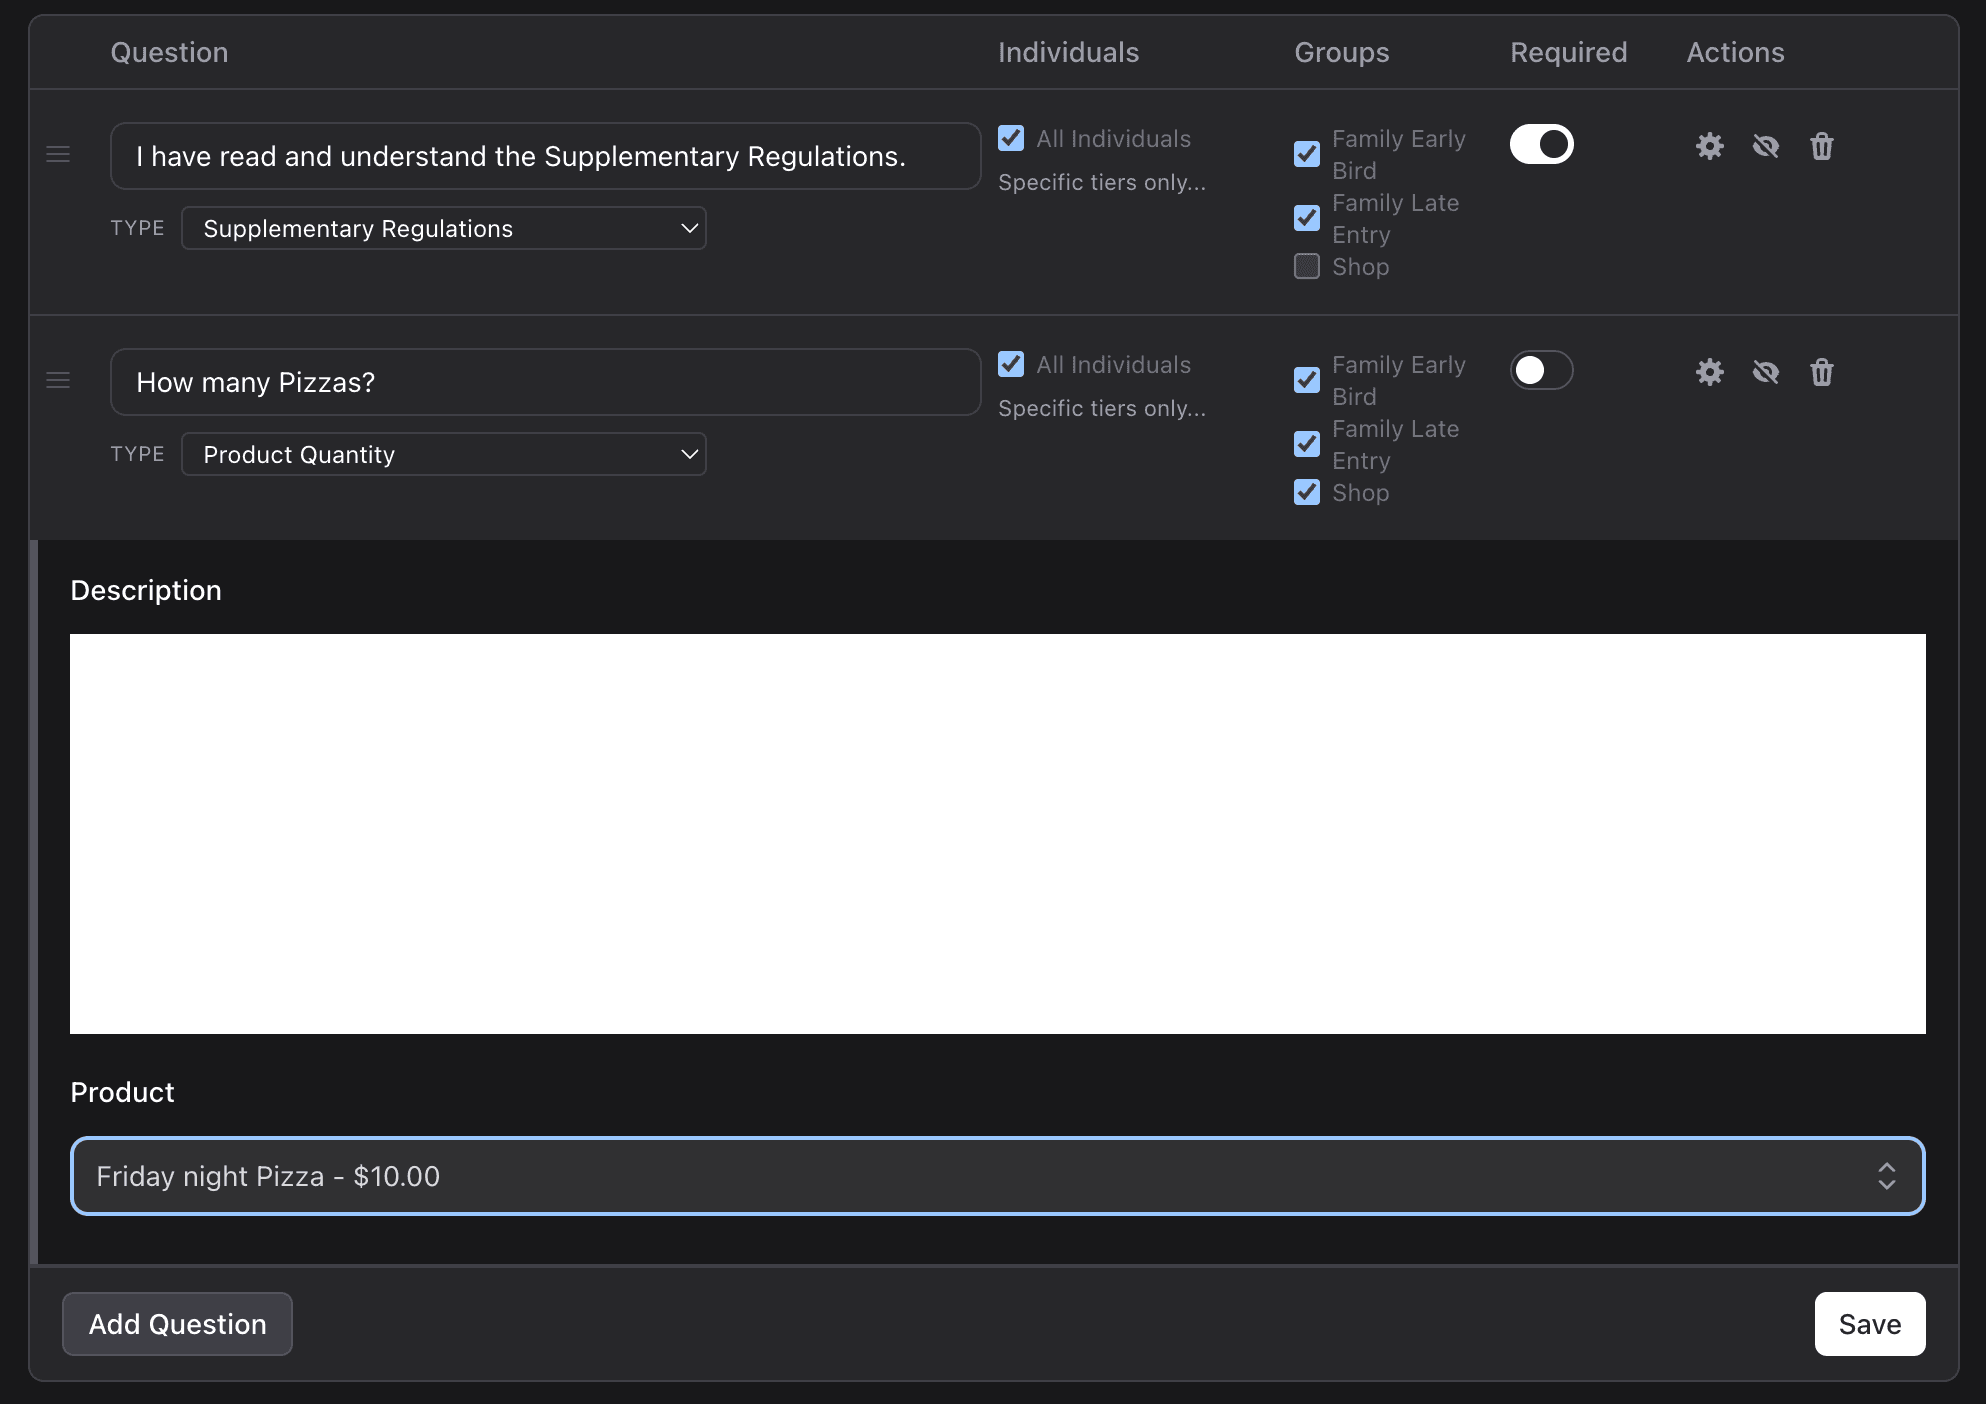
Ticking the entry tier groups shows the product on those regular entry forms as well as the dedicated Shop area — so entrants can grab a pizza while entering, and non-entrants (or anyone coming back later) can buy one through the Shop.
💡 Selling food? If your audience is likely to have allergies and you can handle this, consider adding an optional Text type question to ask for any allergies. You can add your refund policy in the description too — e.g. “Refunds will be given if we can’t cater to your allergies”.
Checking it works
Open your event’s public page, select an entry tier or the Shop, and confirm the product appears with a quantity selector. When you continue to checkout, the order summary should now include the product total, not just the processing fee.
Need a hand? Contact us at info@entryplace.com.au and we’ll get you sorted.